If your application needs conditional access based on the user’s country, you can easily achieve it with a simple Auth0 Action. Let’s see how you can do it.
Why a Country-based Login?
Controlling user access based on the country where they're located when they log in to your application may have different reasons. To mention just a few of them:
- Legal reasons. Laws are different around the world. This leads to adapting access to services or content offered by your application so that it does not break the laws of a particular country. For example, think of online gambling: it is illegal in some countries. Also, think of the liability requirements of GDPR for Europe: you must comply with them in order to offer your services to European citizens.
- Business reasons. A company may decide not to offer their services or product to a country for business reasons: maybe because the cost of delivering that product or service in a given country is not affordable, or because the pricing strategy may depend on the country. You can even consider copyright licenses: think of the availability of video on-demand services due to copyright restrictions, for example.
- Security reasons. You may consider accesses coming from a given country dangerous because most traffic is statistically malicious.
Depending on the reason you want to control user access and on the services or content offered by your application, you can apply different restriction levels. You can range from blocking access to your application (geo-blocking) to adapting your services or content to that country's audience.
Be aware that the most common technique to geolocate a user is based on their IP address. However, blocking users based on their IP address can be easily circumvented through VPNs or anonymizer services.
Using Auth0 Actions
This article will focus on how you can use Auth0 Actions to detect the user's country and how to block them or require a second authentication factor. Auth0 Actions are JavaScript functions running in a Node.js environment executed when specific events happen in a few internal Auth0 Flows, such as the Login Flow, the Change Password Flow, the User Registration Flow, etc.
Each Flow is made up of one or more triggers. For example, the Login Flow runs when a user logs in. This Flow has a post-login trigger: an event fired after the user logs in. You can handle this event through one or more Actions. You can think of Actions as event handlers that run when a specific event fires in an Auth0 Flow.
The following is a graphical representation of an Action (AddRoles) that will be executed in the Login Flow after the user logs in:
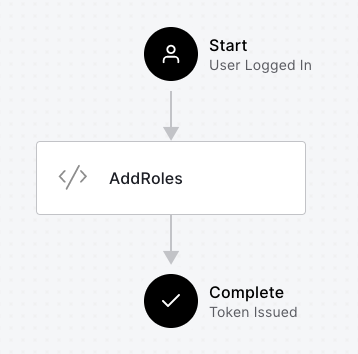
In the following, you will use the post-login trigger of the Login Flow to detect the user's country and apply your control strategy.
To learn more, you can check out this blog post for a quick introduction to Auth0 Actions.
Blocking Logins from a Country
Let's assume you want to block users coming from a given country. As I said, you need to create an Auth0 Action to handle the post-login trigger. So, head to your Auth0 dashboard. If you don't have an Auth0 account yet, you can sign up for a free one.
Select Actions on the left side menu and then Flows. You should land on the following page:
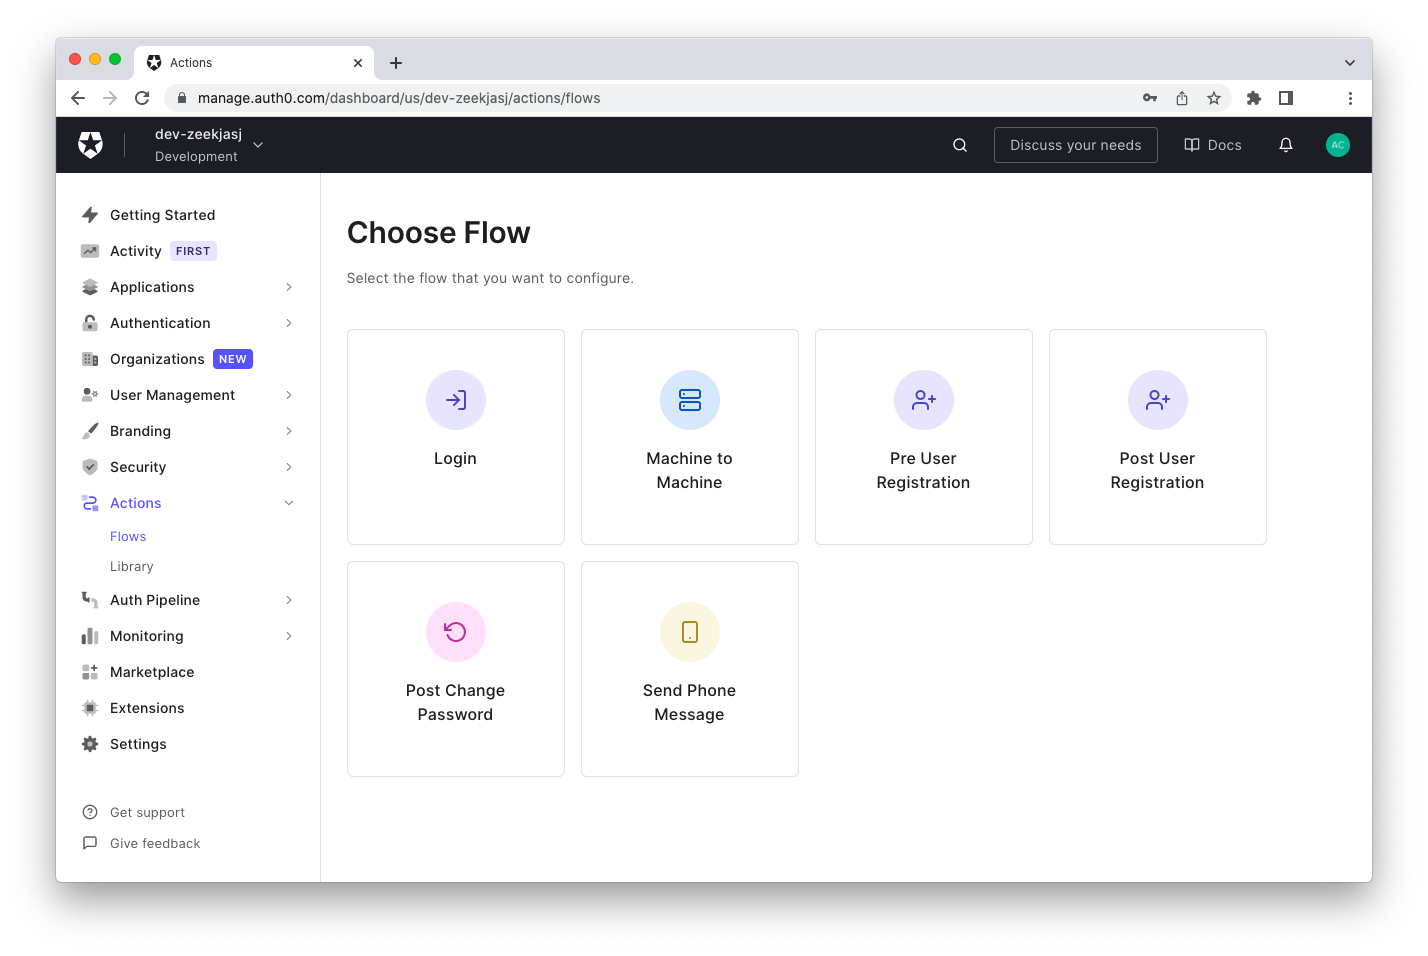
Click the Login Flow and enter the Flow editor, as shown below:
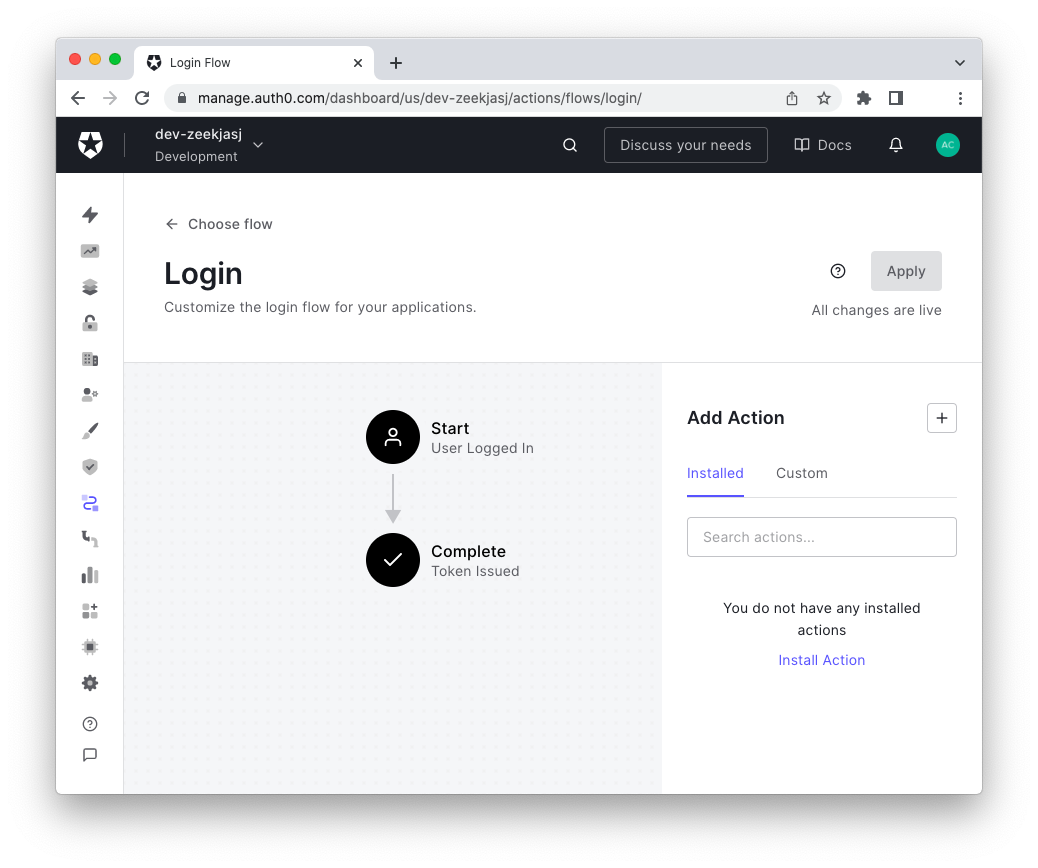
Here, you can add a custom Action by clicking the Build Custom menu item in the Add Action section of the Flow editor:
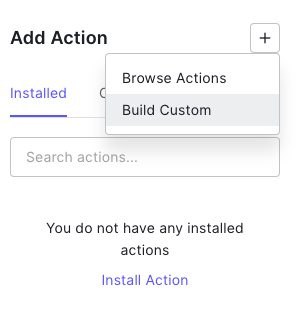
This allows you to assign a name to the Action you are going to create and to access the Action editor:
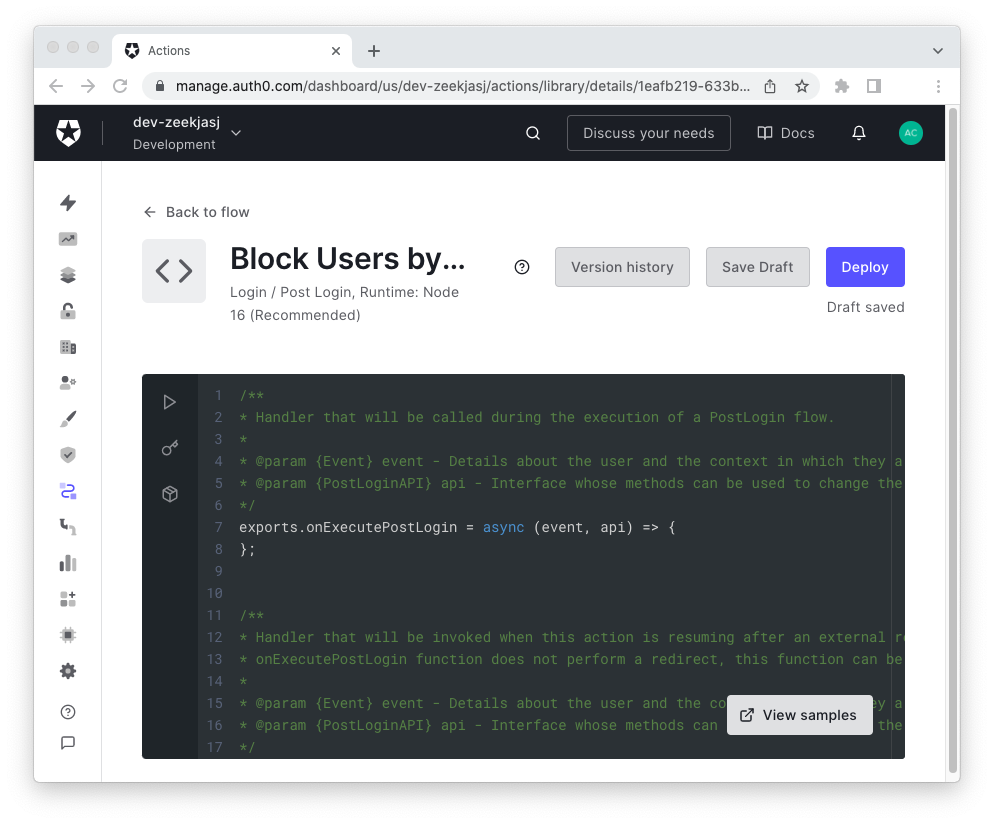
Replace the code in the editor with the following:
exports.onExecutePostLogin = async (event, api) => {
  if (event.request.geoip.countryCode === "AQ") {
    const countryName = event.request.geoip.countryName;

    api.access.deny(`Users from ${countryName} are not allowed!`);
  };
};
This code defines the
onExecutePostLogin()eventapiThe
eventeventThe
apiapiIn your Action, you used the
event.request.geoipcountryCodeAQgeoipcountryNameeventIf the user's country is Antarctica, access is denied through the
api.access.deny()deny()Click the Save Draft button to store the Action you just created.
To test this Action, you should... move to Antarctica and try to log in to your application from there. This approach is a bit expensive and ineffective 🙂. Alternatively, you can test the Action by using the Test button on the upper-left corner of the Action editor. It opens a sliding window whose content is the
event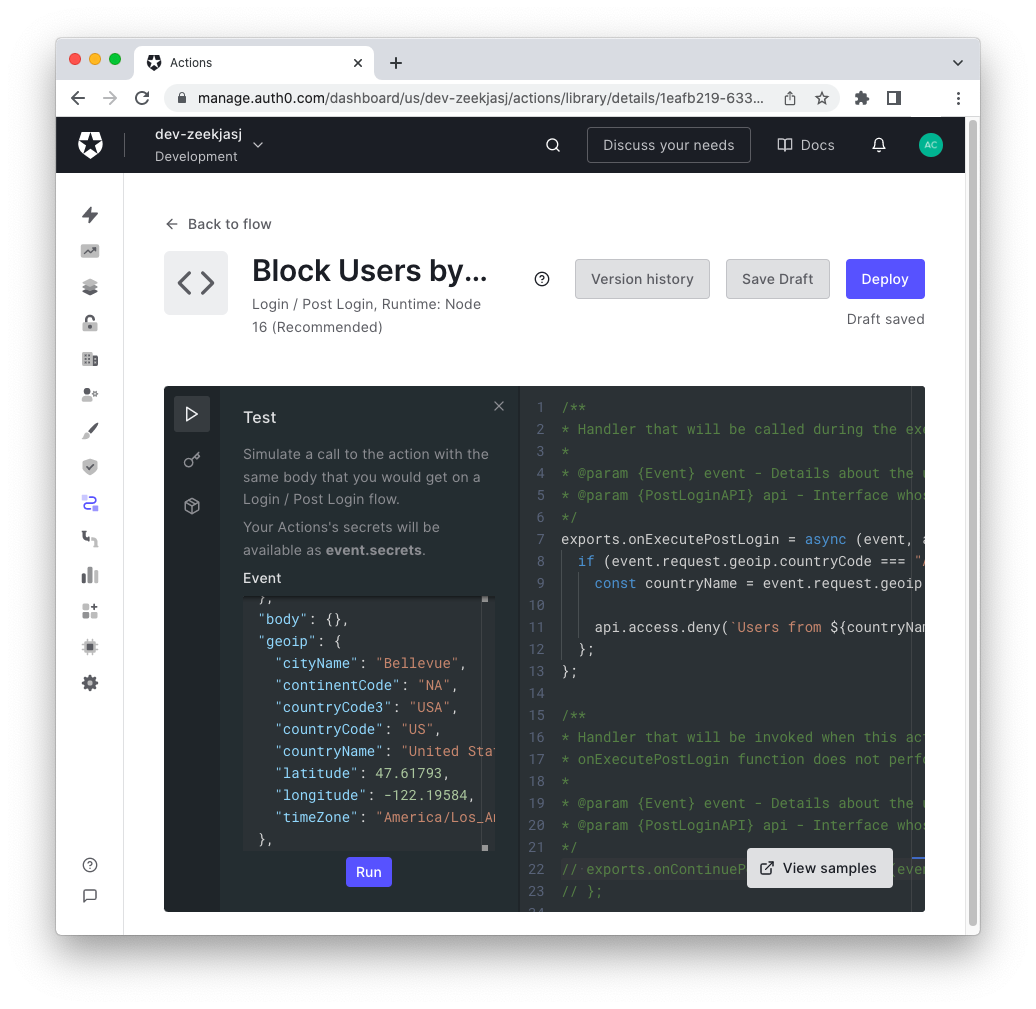
You can modify the
geoip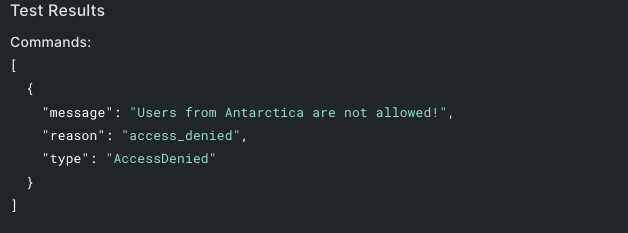
Requesting MFA from a Country
In addition to or instead of blocking users, you may want to enforce Multi-Factor Authentication (MFA) for users logging in from specific regions. First, you must have configured MFA in your Auth0 dashboard. This lets you define what additional factor you want to use. The next step is to force MFA when a user logs in from specific regions.
For example, assume you want to enforce MFA for North American users. You can create an Action with the following code:
exports.onExecutePostLogin = async (event, api) => {
  if (event.request.geoip.continentCode === "NA") {
    api.multifactor.enable("any");
  };
};
In this case, you used the
continentCodegeoipapi.multifactor.enable()"any"To make your Action available to the Login Flow in your production environment, you have to click the Deploy button and drag the newly created Action into the Flow editor, as explained in the introduction to Auth0 Actions.
Recap
In conclusion, throughout this article, you learned the main reasons you may want to control user access to your application on a country-based criterion and how you can implement it with Auth0 Actions. You learned the geolocation features of the
event.request.geoipHowever, remember that while the geolocation approach is pretty straightforward, it is not infallible.
About the author

Andrea Chiarelli
Principal Developer Advocate
I have over 20 years of experience as a software engineer and technical author. Throughout my career, I've used several programming languages and technologies for the projects I was involved in, ranging from C# to JavaScript, ASP.NET to Node.js, Angular to React, SOAP to REST APIs, etc.
In the last few years, I've been focusing on simplifying the developer experience with Identity and related topics, especially in the .NET ecosystem.
